01635895-9442-4adb-ae26-544fb8eafc1e.jpg# Simulator Settings
Simulator settings allow you to adjust the Runtime Settings to simulate different Immersive Spaces from within the Unity Editor. The settings you change here will not affect your build.
All simulator settings can be adjusted at any time including during Play Mode.
Opening Simulator Settings
To open "Simulator Settings" click "Immersive Interactive" > "Simulator Settings"
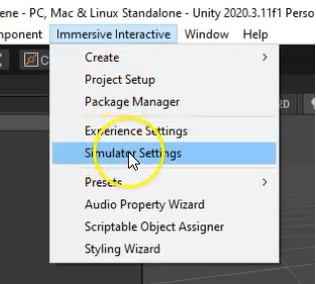
The Simulator Settings window will then open.
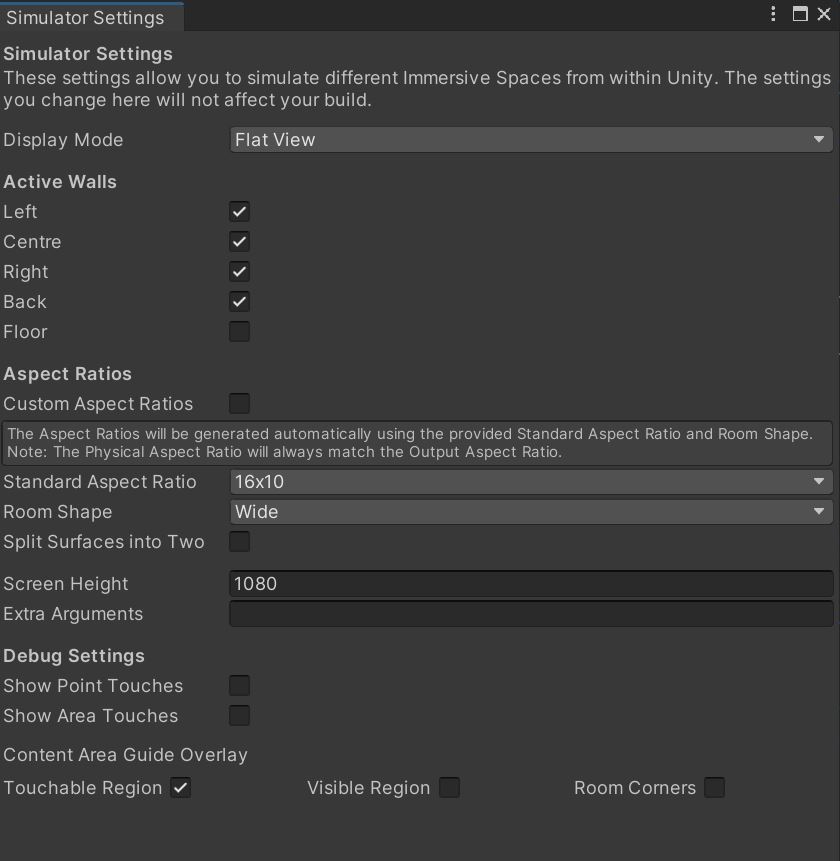
Display Mode
"Display Mode" allows you to switch between "Flat View" and "Virtual Room". The content is exactly the same is both.
In Virtual Room mode the surfaces are presented in 3D space where you can move the camera using WASD keys and rotate by right clicking and dragging.
In Flat View surfaces are presented in one "flat" plane. You can zoom in and out using the scroll bar or the zoom buttons. Right clicking and dragging allows you to pan around the surfaces while zoomed in.

Active Walls
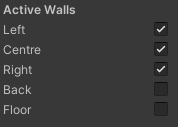
"Active Walls" allows you to decide which surfaces are enabled.
Aspect Ratio
Aspect Ratio settings will determine the Output Aspect Ratio. This can be different from the Rendered Aspect Ratio causing rendered content to be stretched or compressed. For more information read the Aspect Ratios Documentation.

The default way of setting your output aspect ratio is defining a "Standard Aspect Ratio". This can be "16x10", "16x9" and "4x3". From this the aspect ratio of each surface will be calculated. The "Standard Aspect Ratio" represents the aspect ratio of a "Standard Surface". "Wide Surfaces" will be 2 times this aspect ratio.
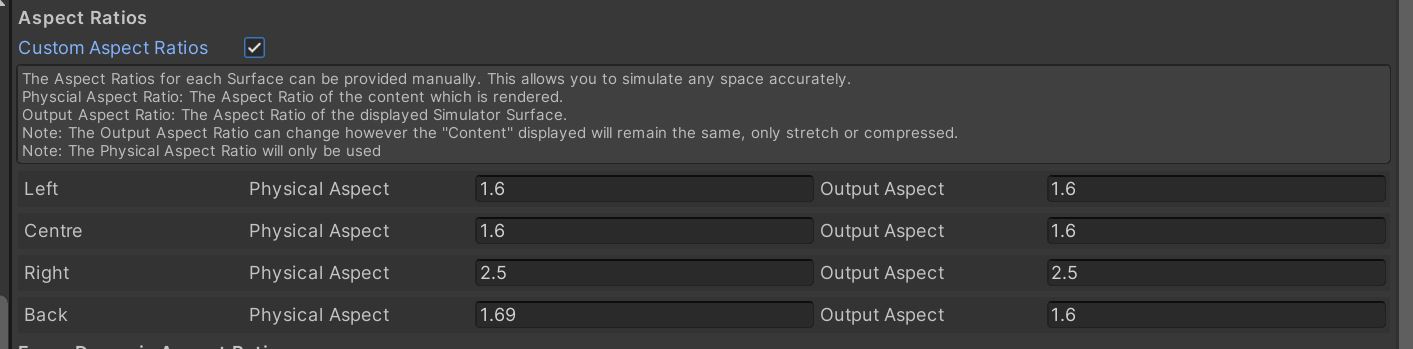 By selecting Custom Aspect Ratios you have fine grained control over the Output Aspect Ratio and Physical Aspect Ratio for each surface. This is only recommended if you have a specific usecase that requires this extra control.
Room Shape
"Room Shape" lets you pick from the 3 layouts, "Standard", "Wide Front" and "Wide". In "Standard" all walls are Standard Aspect Ratio. In "Wide Front" the Centre and Back walls will be double width. In "Wide" all walls are double width.

Screen Height
"Screen Height" determines the render resolution of the simulated surfaces. All surface will be the provided number of pixel tall and the width will be determined from the using the surfaces output Aspect Ratio.
In most cases a value of 1080px works well.

Extra Arguments
"Extra Arguments" allows you simulate the passing of extra runtime arguments to the experience.

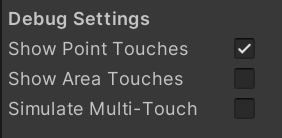
Debug Settings
- The Show Point/Area Touches settings allow you to draw a marker showing where Point and Area touch are.
- When Simulate Multi-Touch is enabled users can hold down CTRL + drag to simulate a "pinch" gesture, or Shift + drag to simulate a "pan" gesture.
Content Area Guide Overlay (CAG)
These settings allow you to control which CAG overlays are displayed.
- "Touchable Region" generates a guide outlined in green of where a user is most likely to be able to reach, this can help you plan your placement of where a user may need to interact.
- "Visible Region" generates a guide outlined in red that displays which part of the scene is going to be visible in all room layouts.
- "Room Corners" generates a guide outlined in blue of the areas where a corner may be.
To learn more about CAG visit this page: Content Area Guide (CAG)
