Setting Up Project
Active Input Handling
The Immersive Unity SDK utilises the new Unity Input System therefore you must ensure that that is enabled.
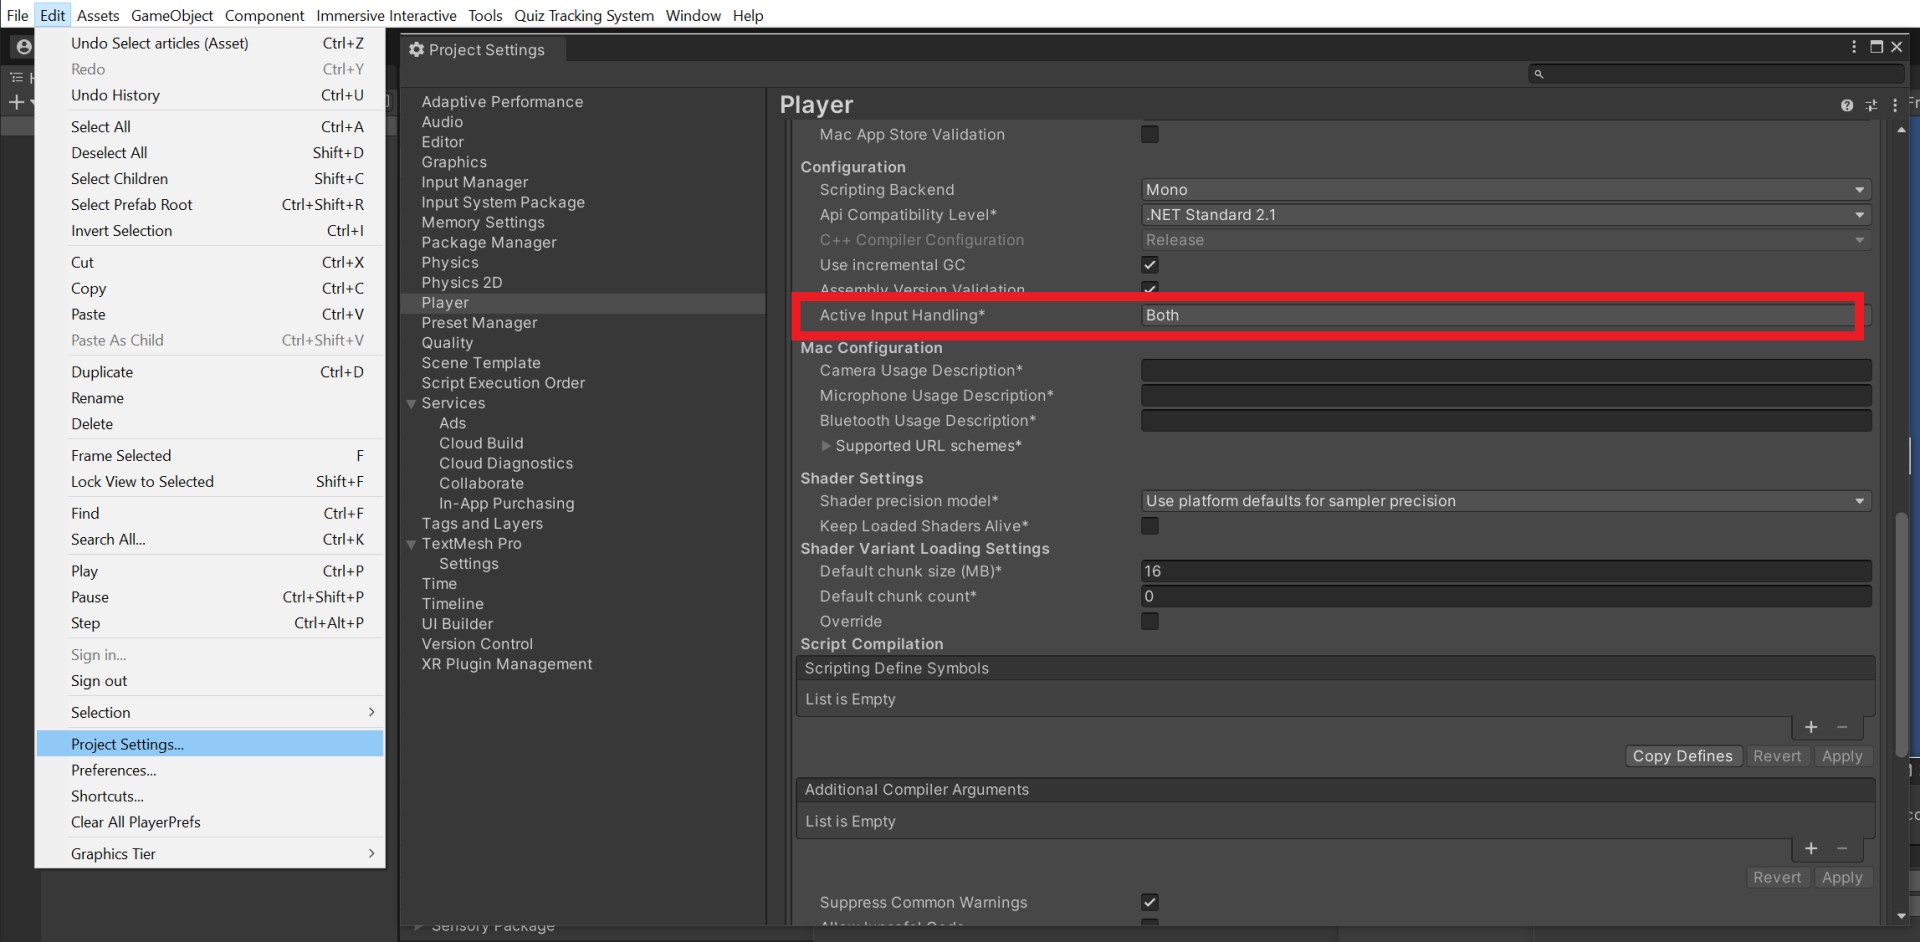
- Open Project settings window Edit > Project Settings.
- Select Player section.
- In Other Settings ensure Active Input Handling is set to "Input System Package (New)" or "Both".
If you change this Unity will restart your project.
Project Setup Window
The Project Setup Window is a Utility window which will help ensure that your project is optimally setup to play Immersive Experiences. To open the window in the menu bar select Immersive Interactive > Project Setup.
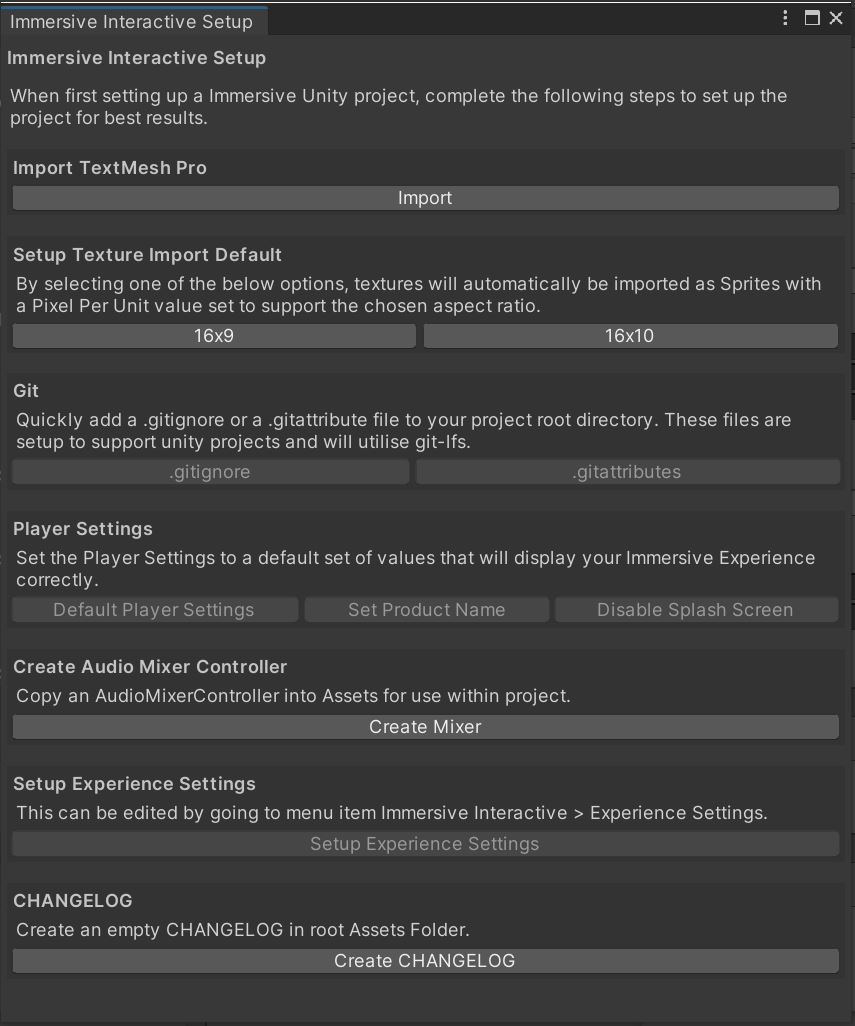
Import TextMeshPro
Shortcut to import TextMeshPro Essential Resources. (Optional)
Setup Texture Import Default
Shortcut to change the Default Texture import settings to import texture as a Sprite. (Optional)
Git
Shortcut to add a .gitignore and .gitattributes file to the root of your project. Only useful if you are using git version control. (Optional)
Player Settings
- Default Player Settings - Sets the player settings for the project to our recommended settings for an optimal Immersive Experience.
- Set Product Name - Sets the application name to Immersive Application (Optional)
- Disable Splash Screen - This option only applies if you have a Unity Pro license.
Create Audio Mixer Controller
Shortcut to create a new Audio Mixer Controller. More Info Audio Mixer Controller.
Setup Experience Settings
- Creates a new Experience Settings object which allows you to control global settings for your entire experience. More Info Experience Settings.